Underwater Editing
I've been asked a few times how I edit my underwater photography, so I thought I'd share with you some before & afters.
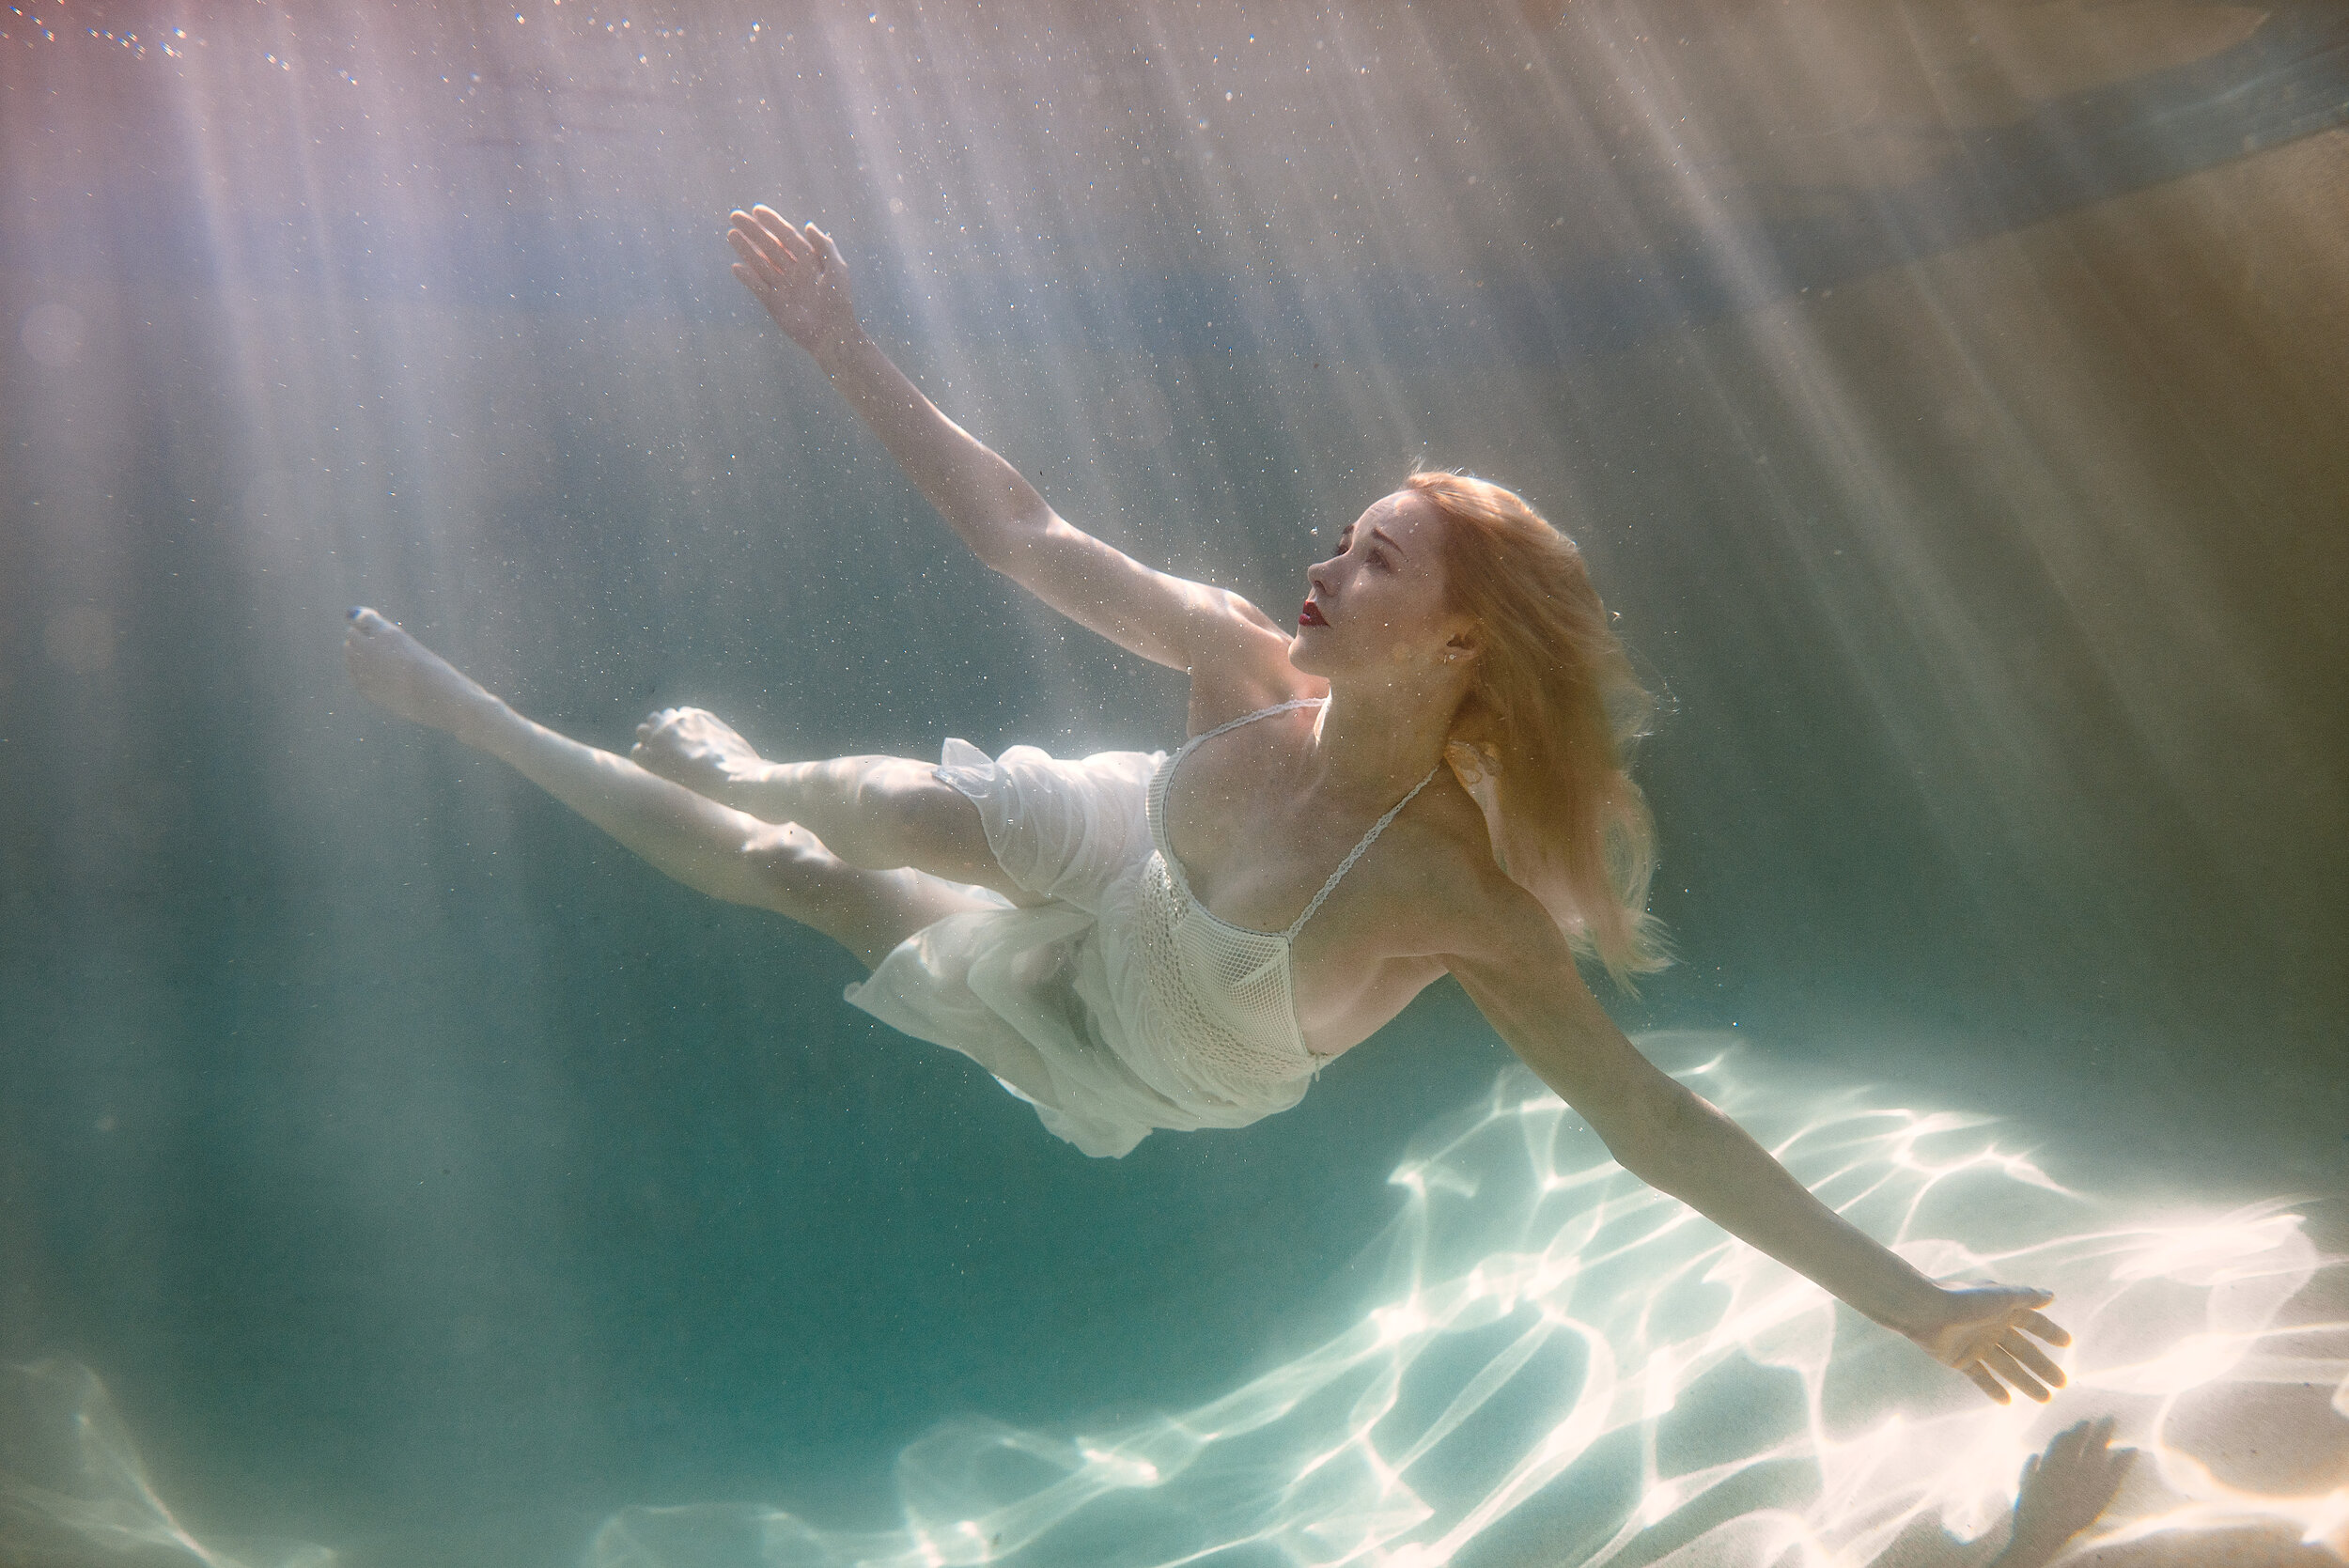
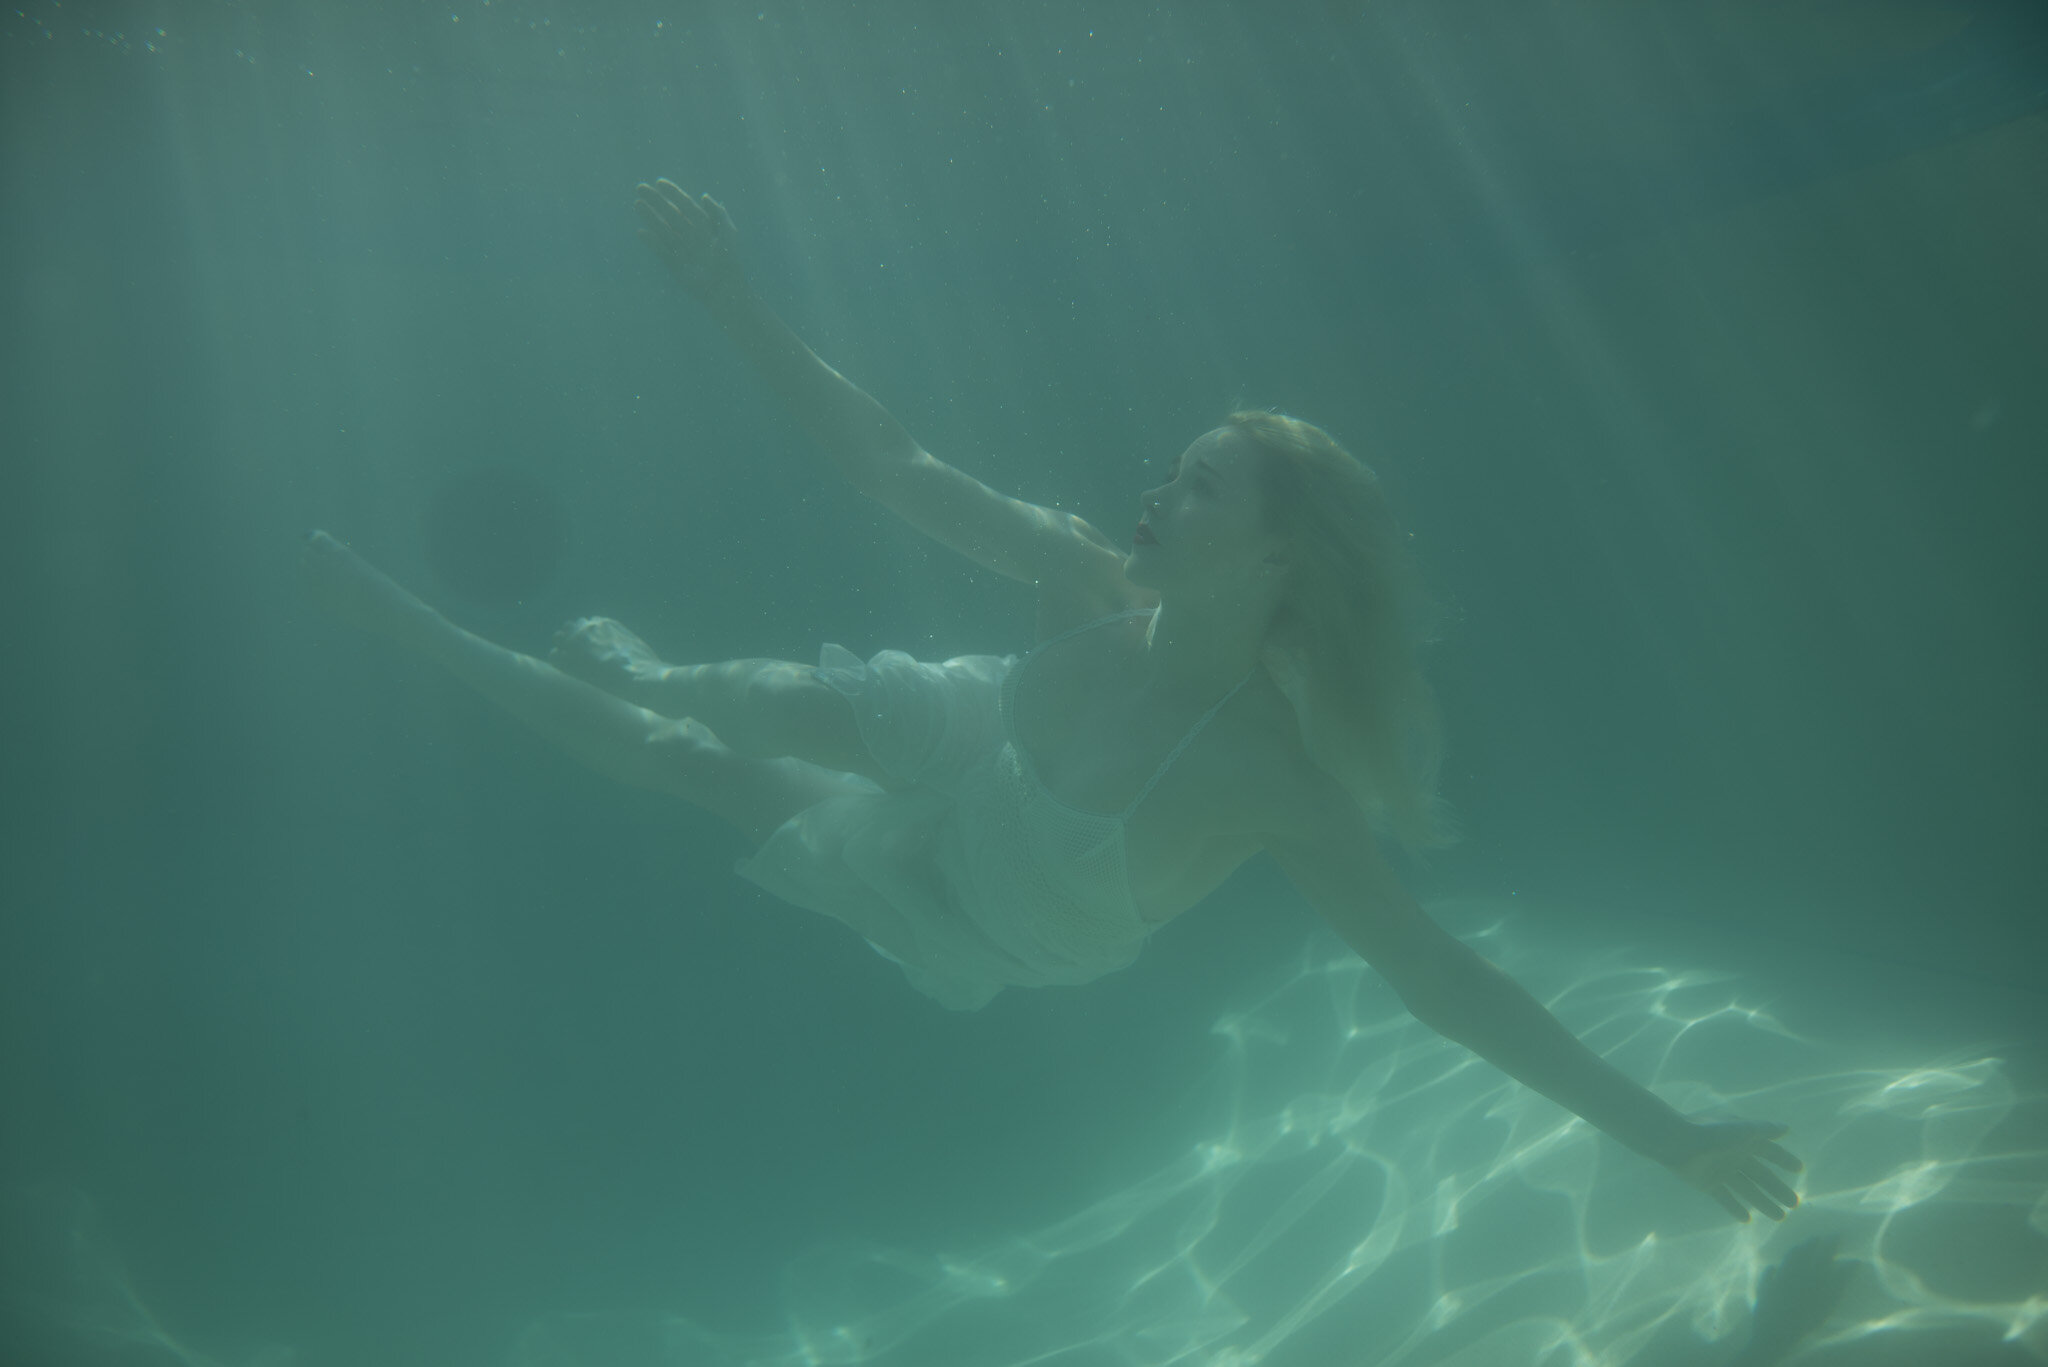
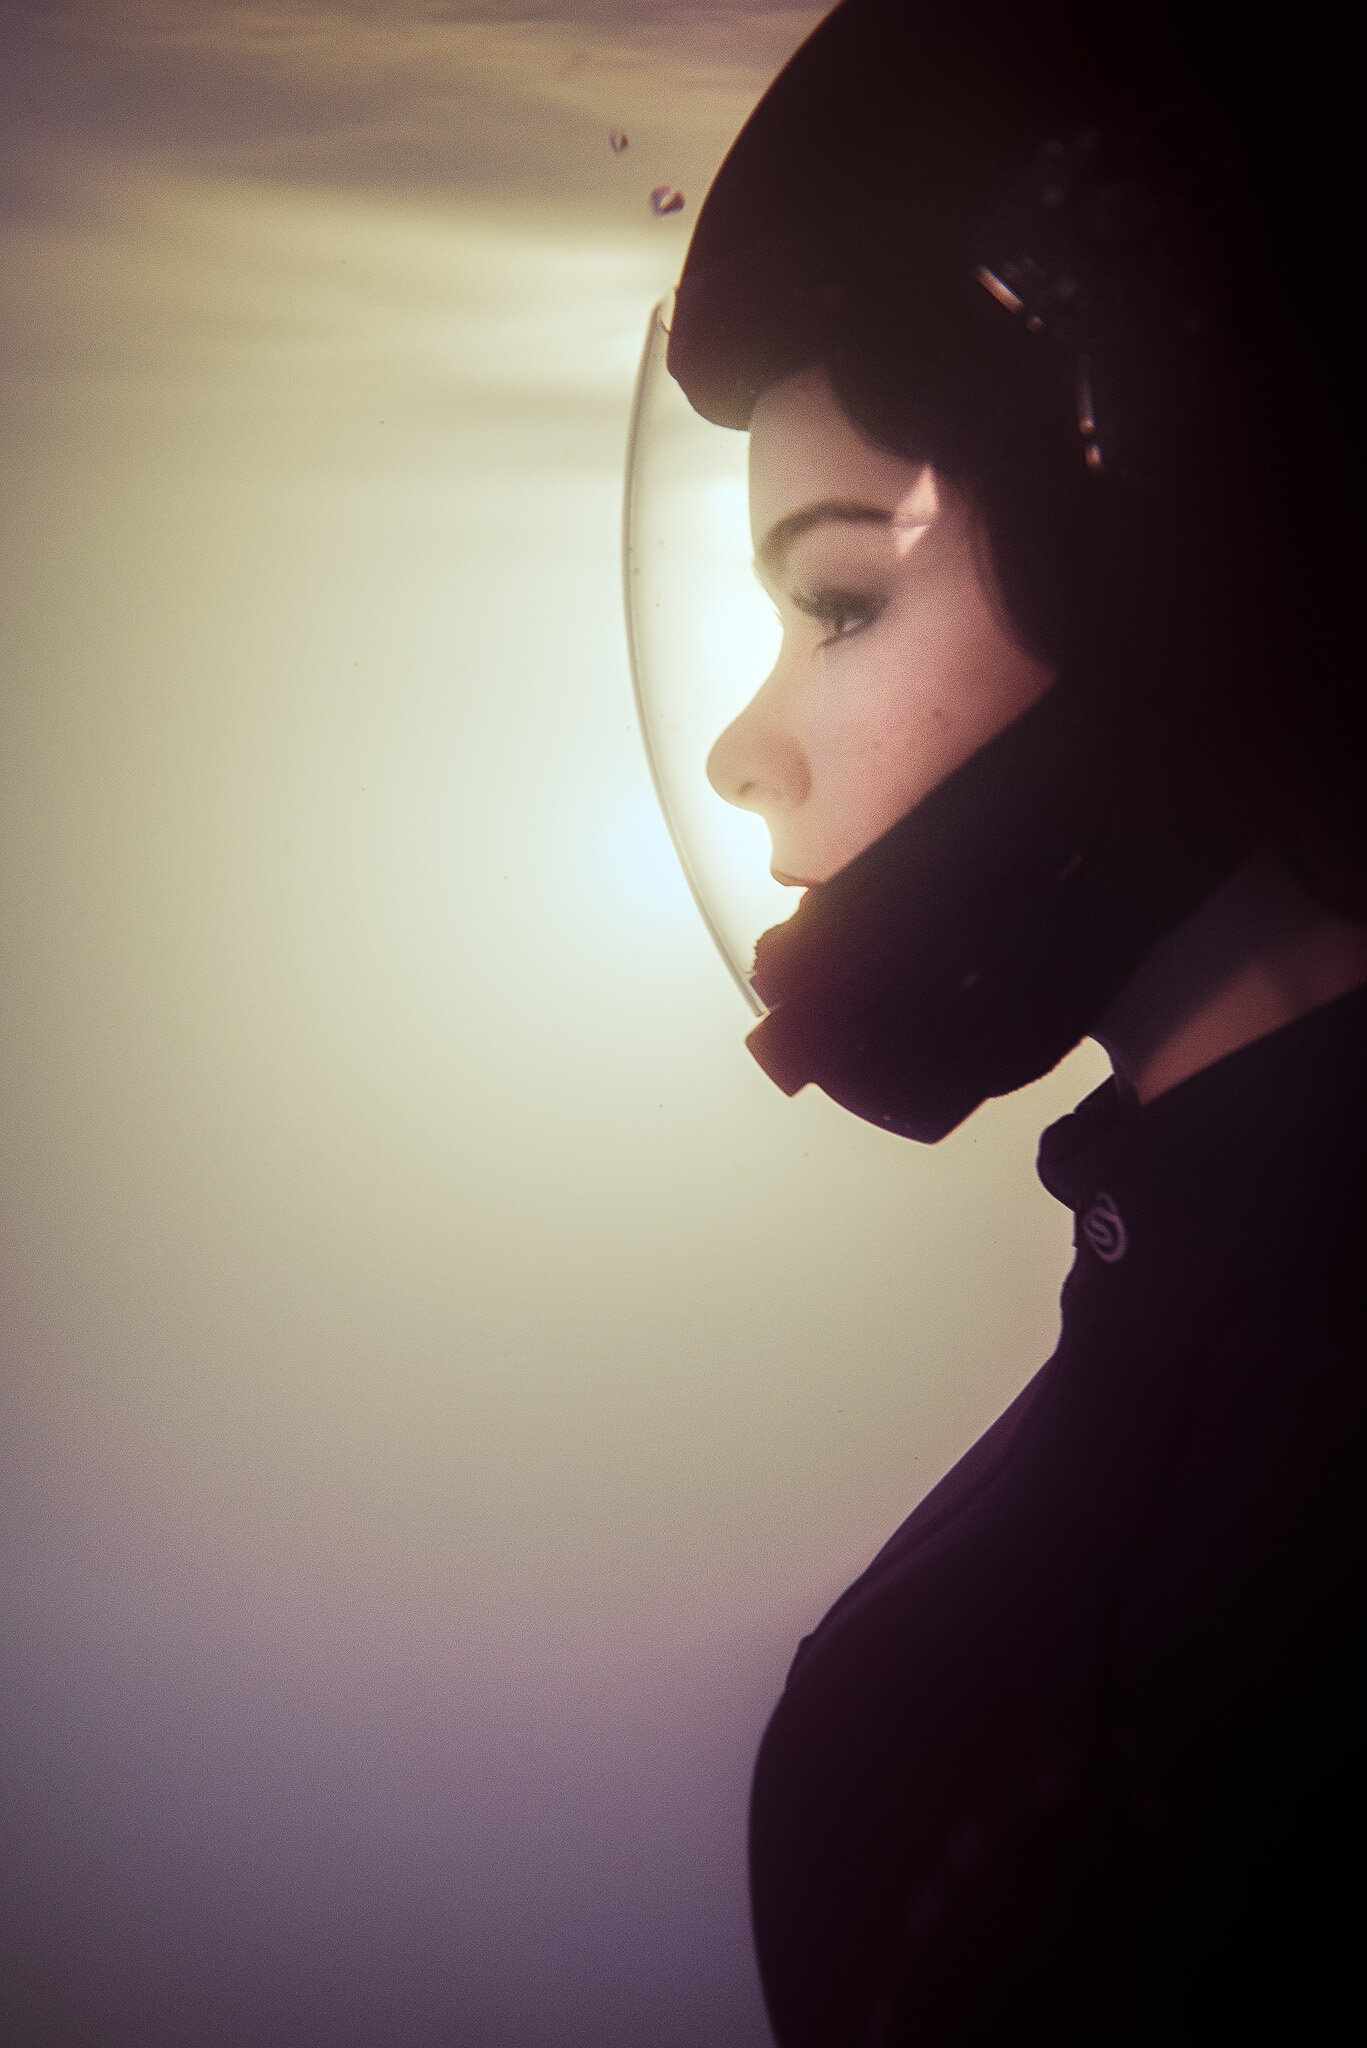
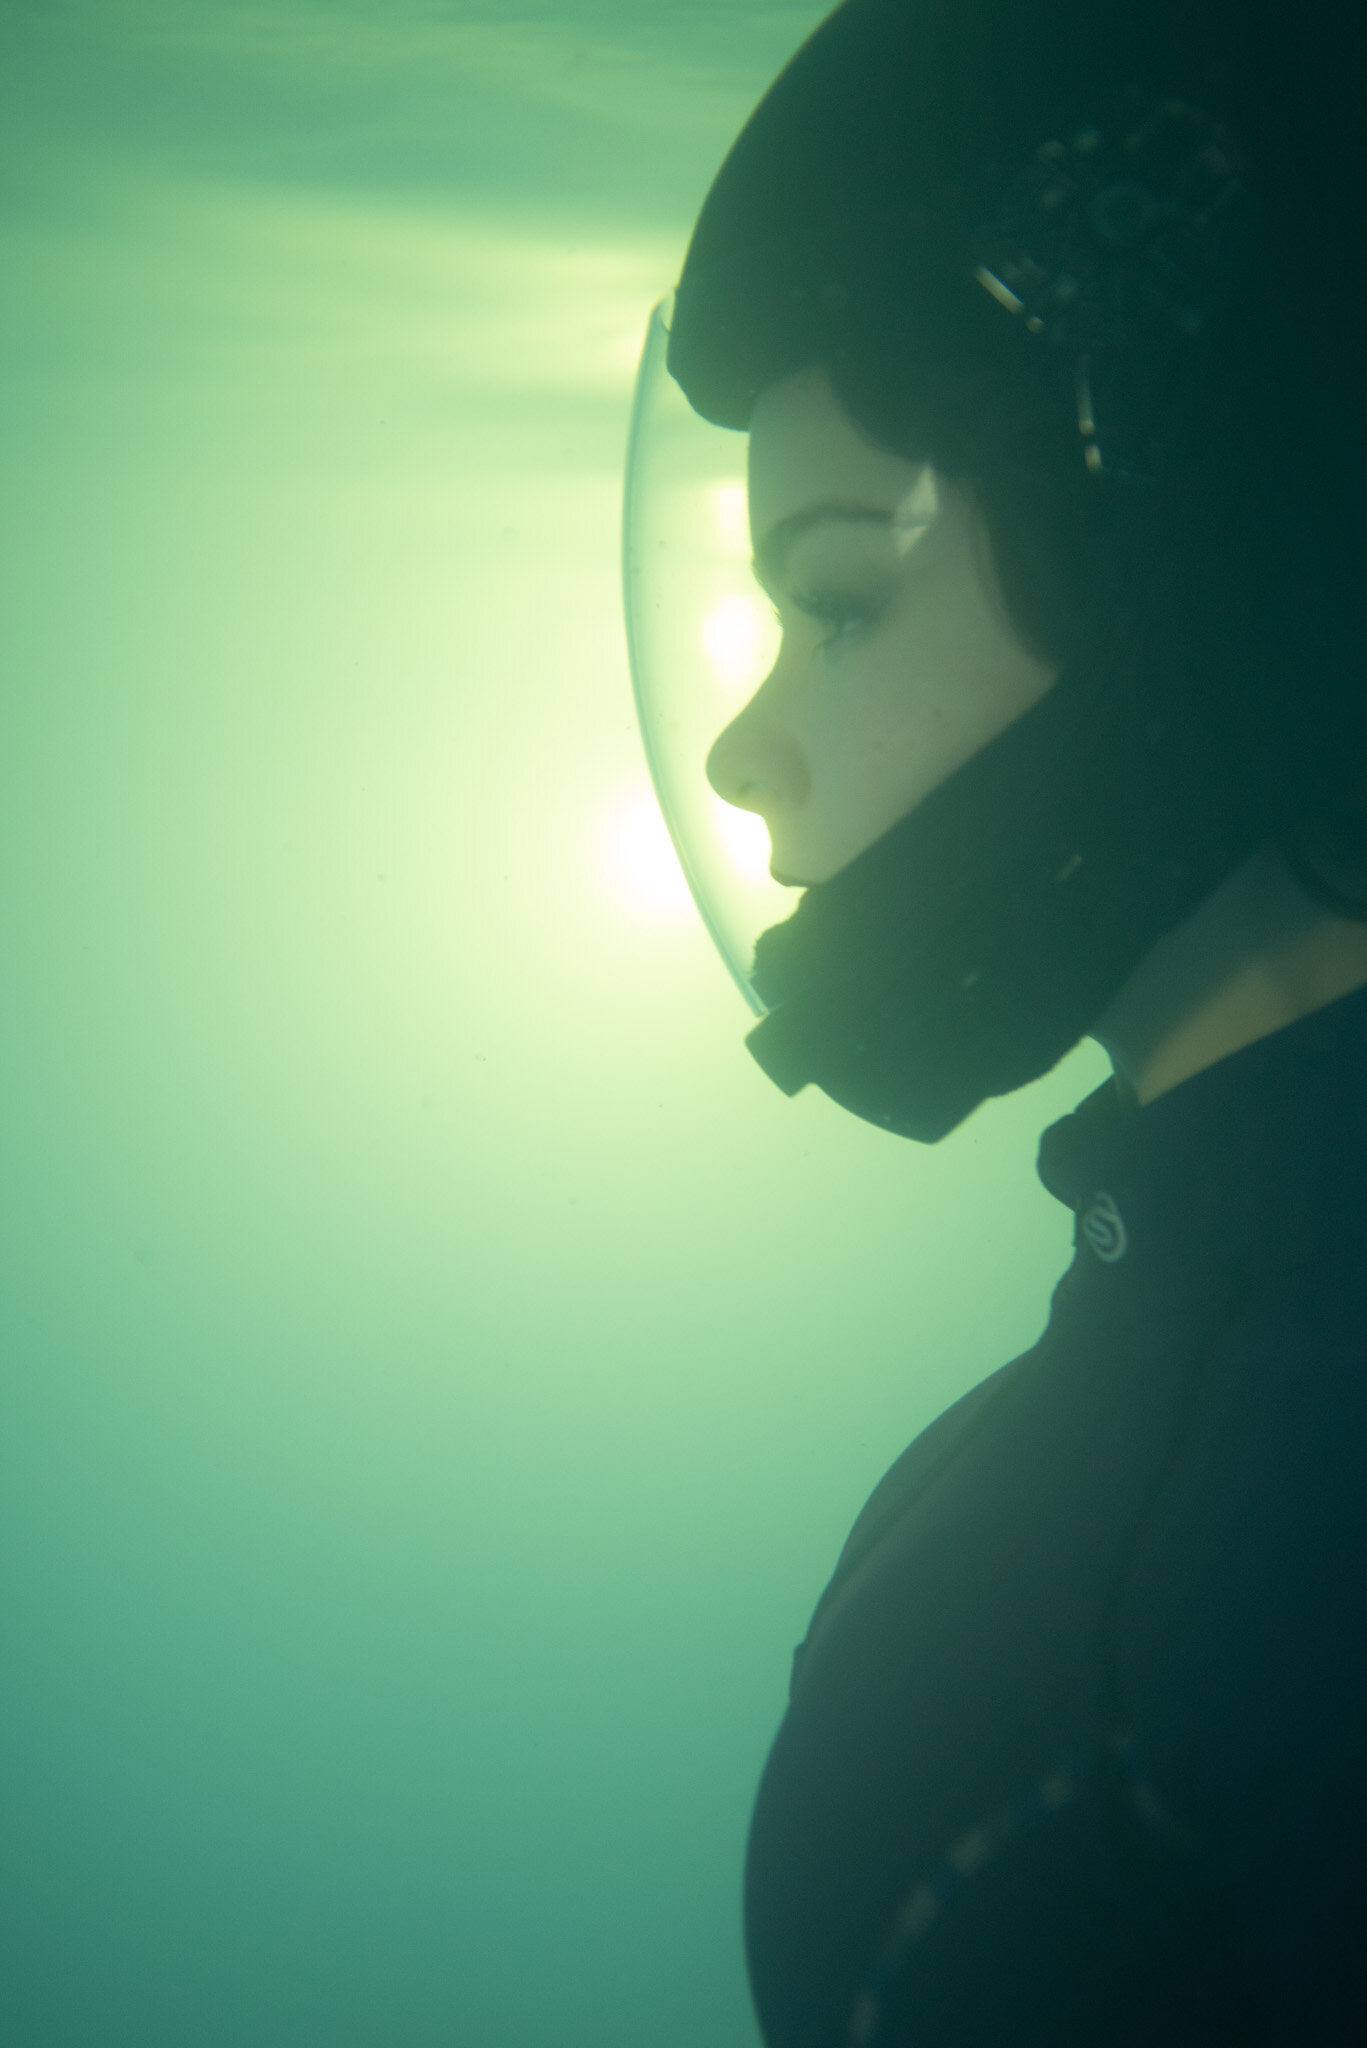
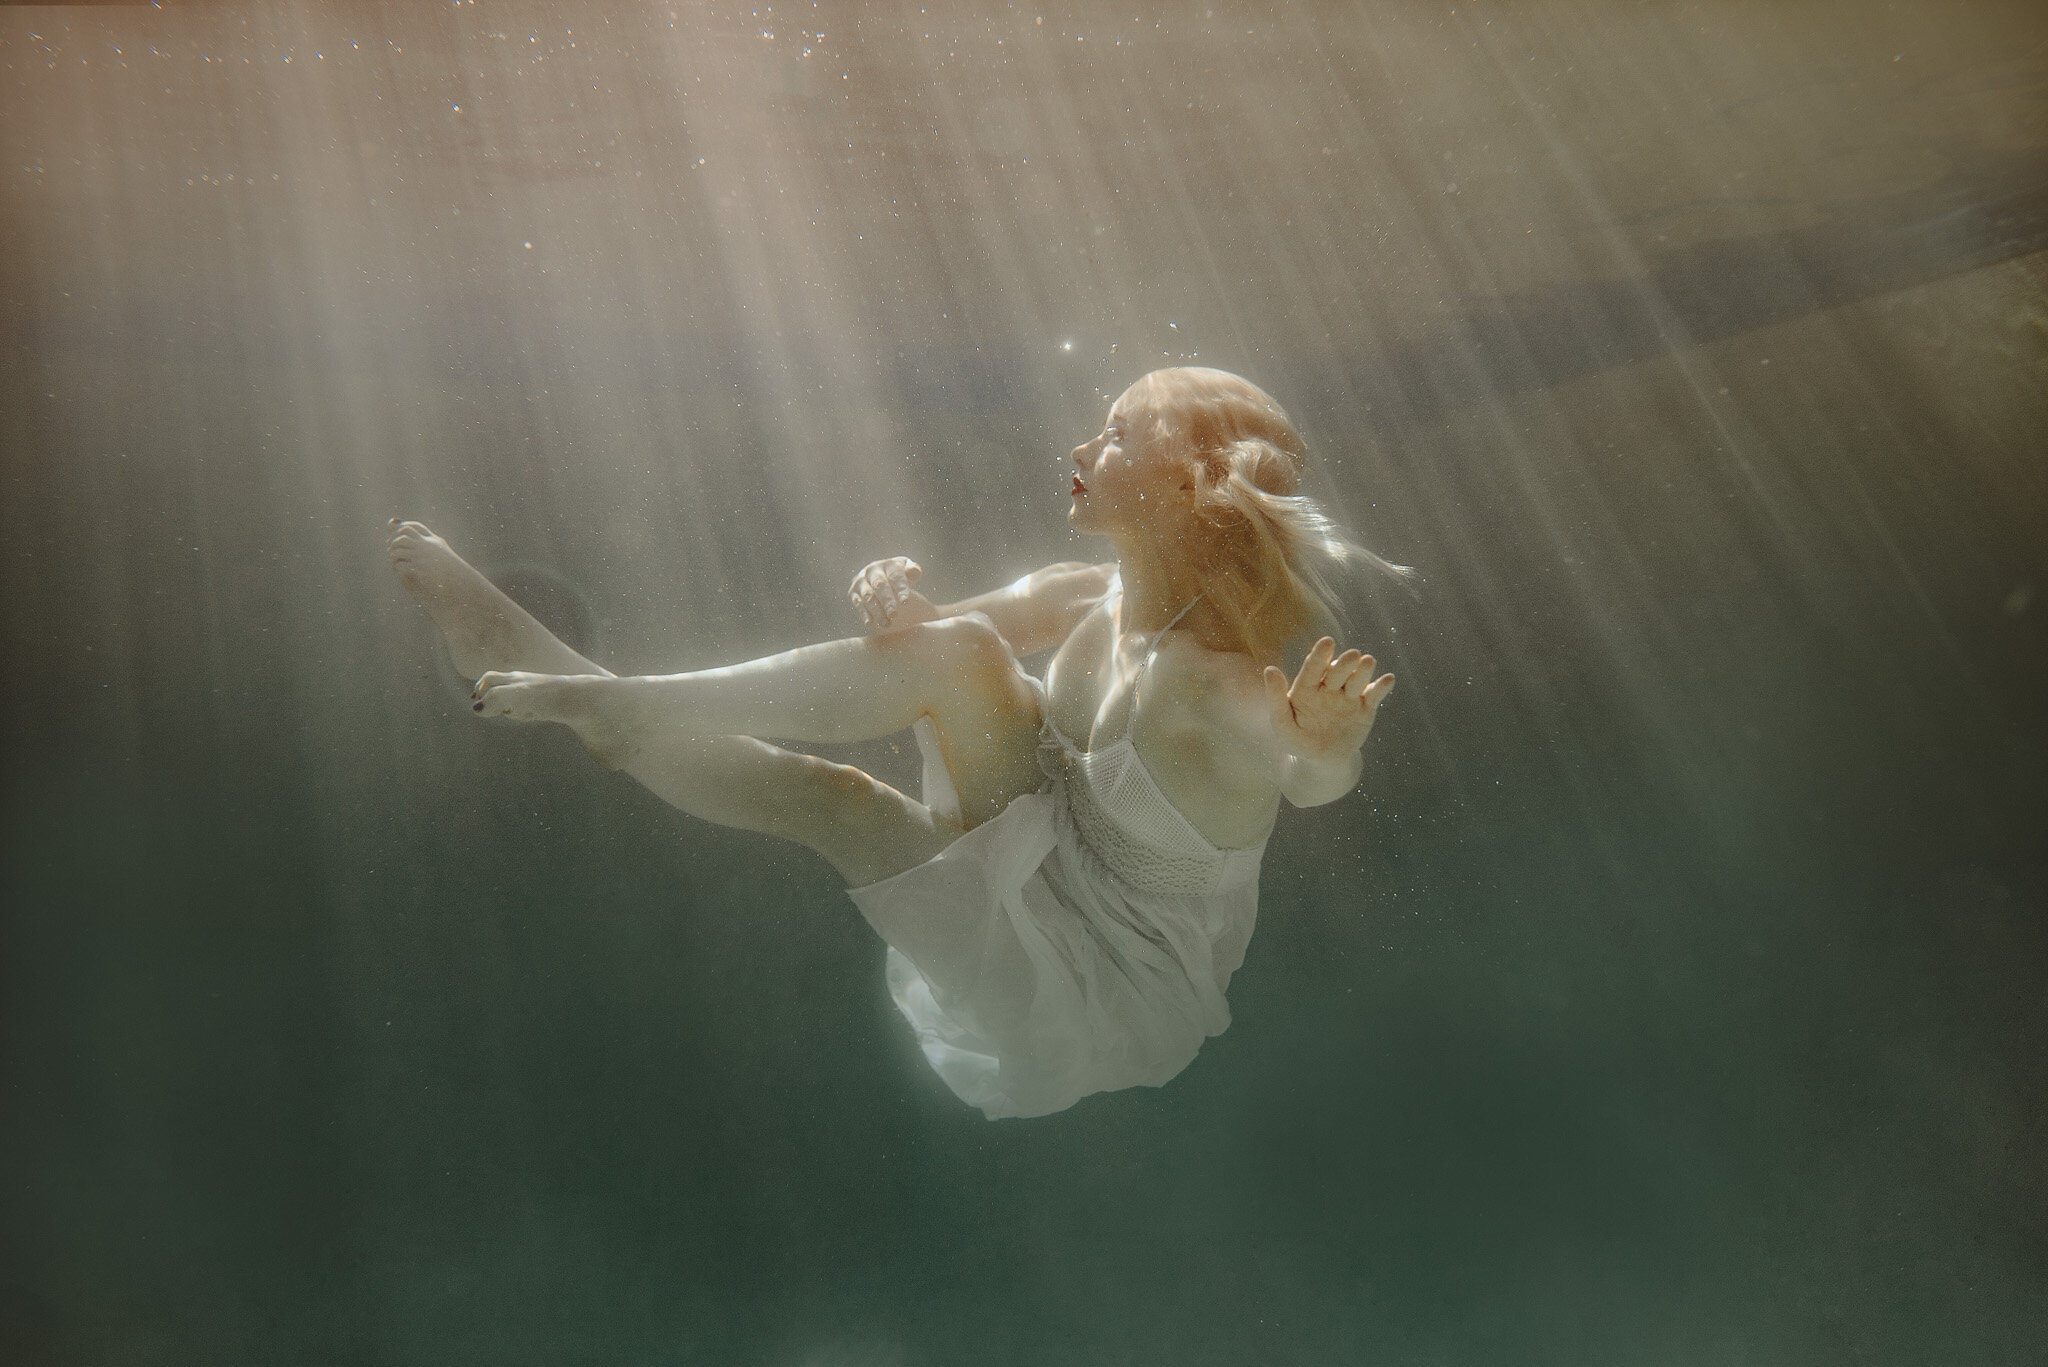
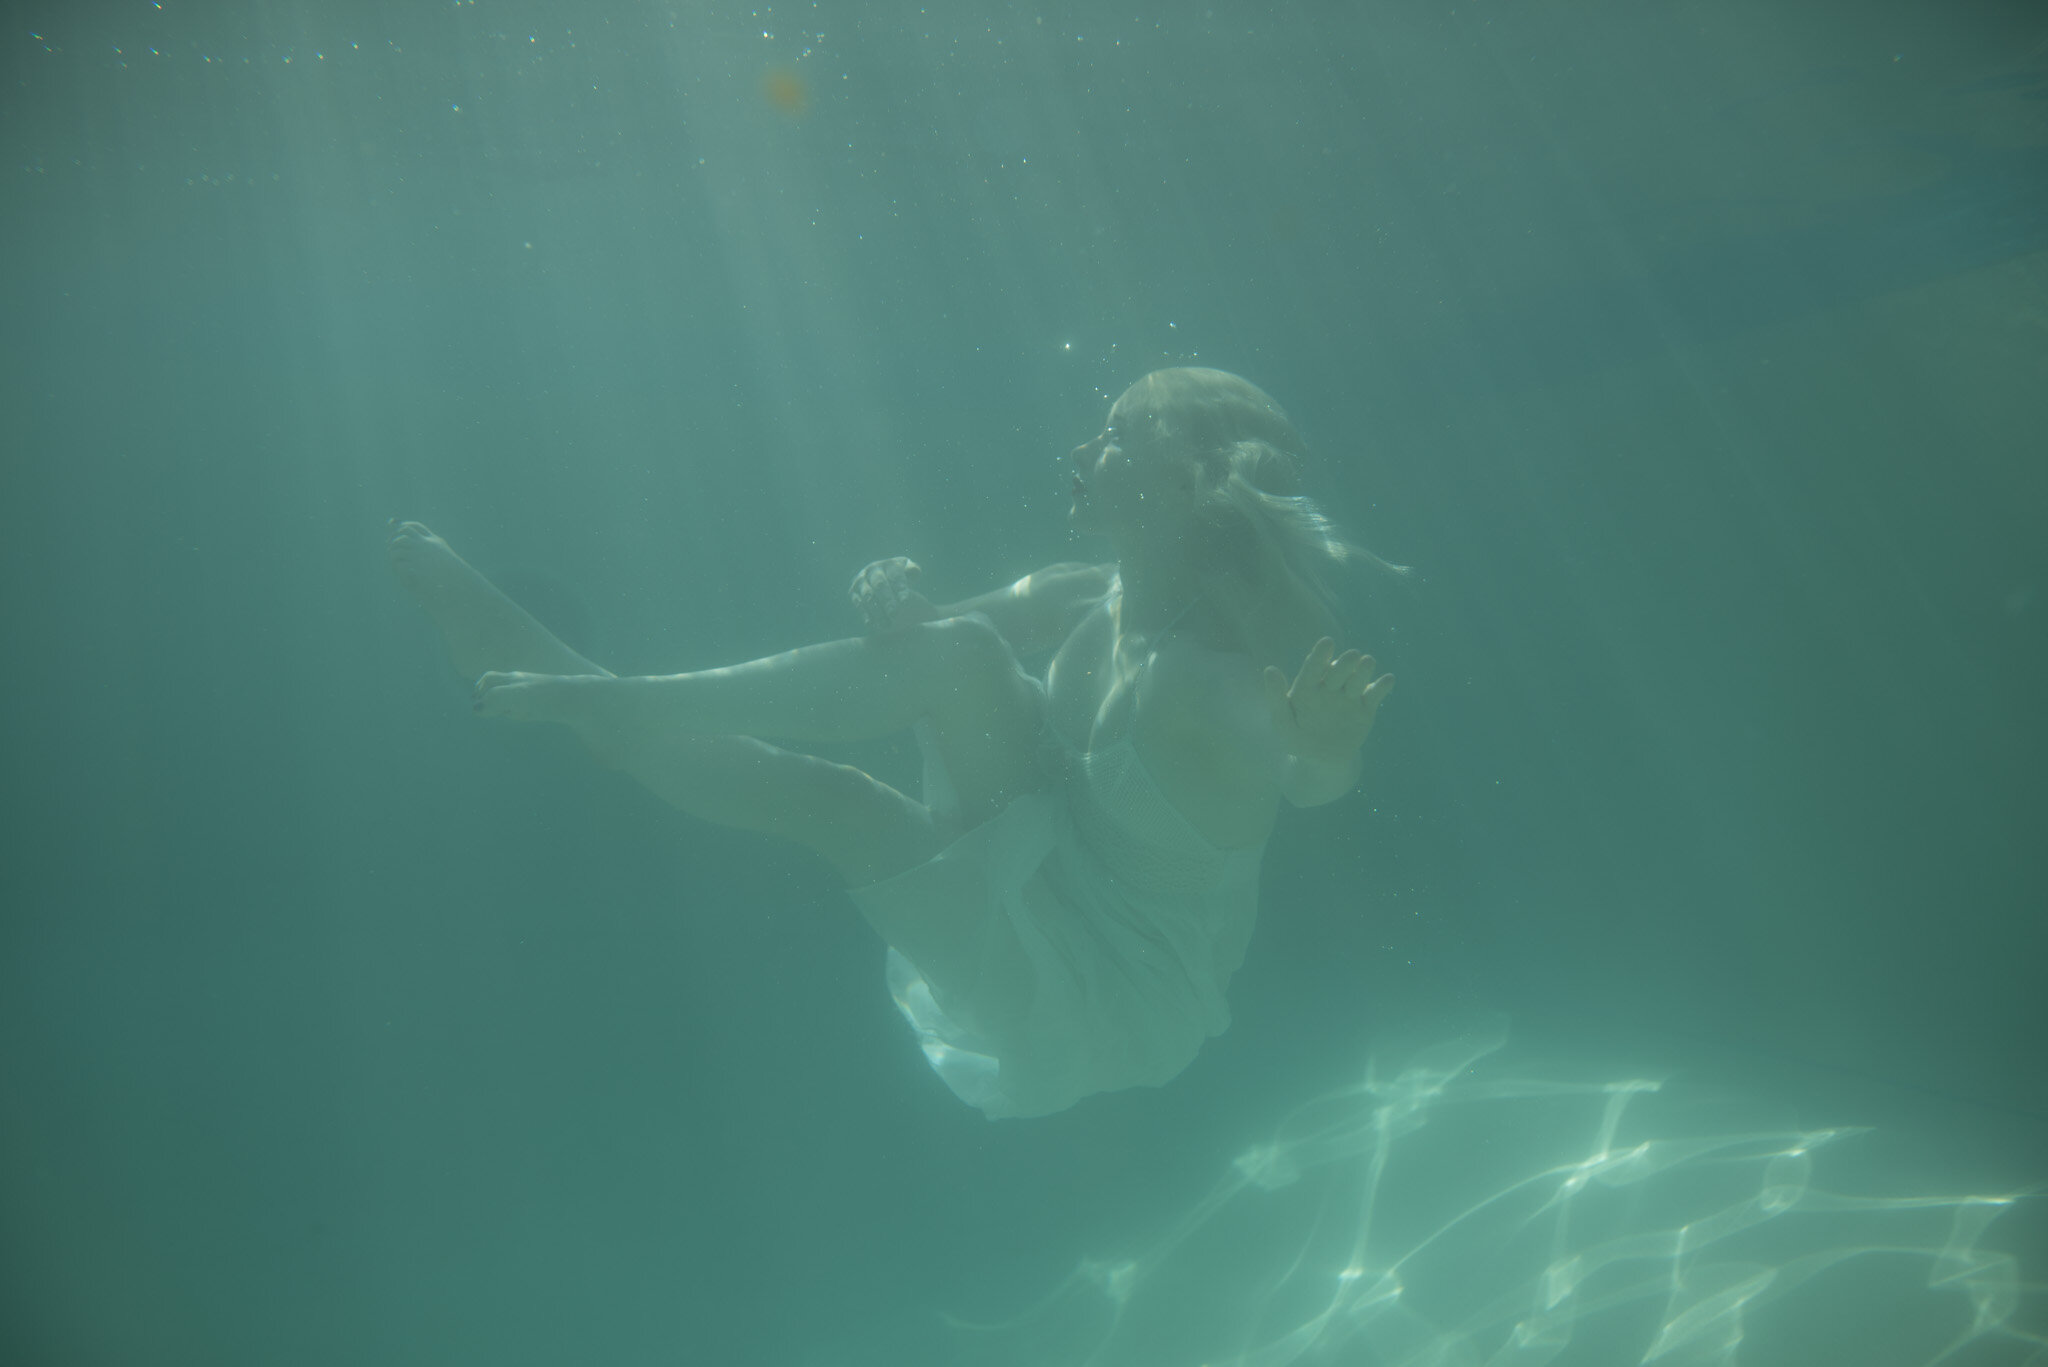
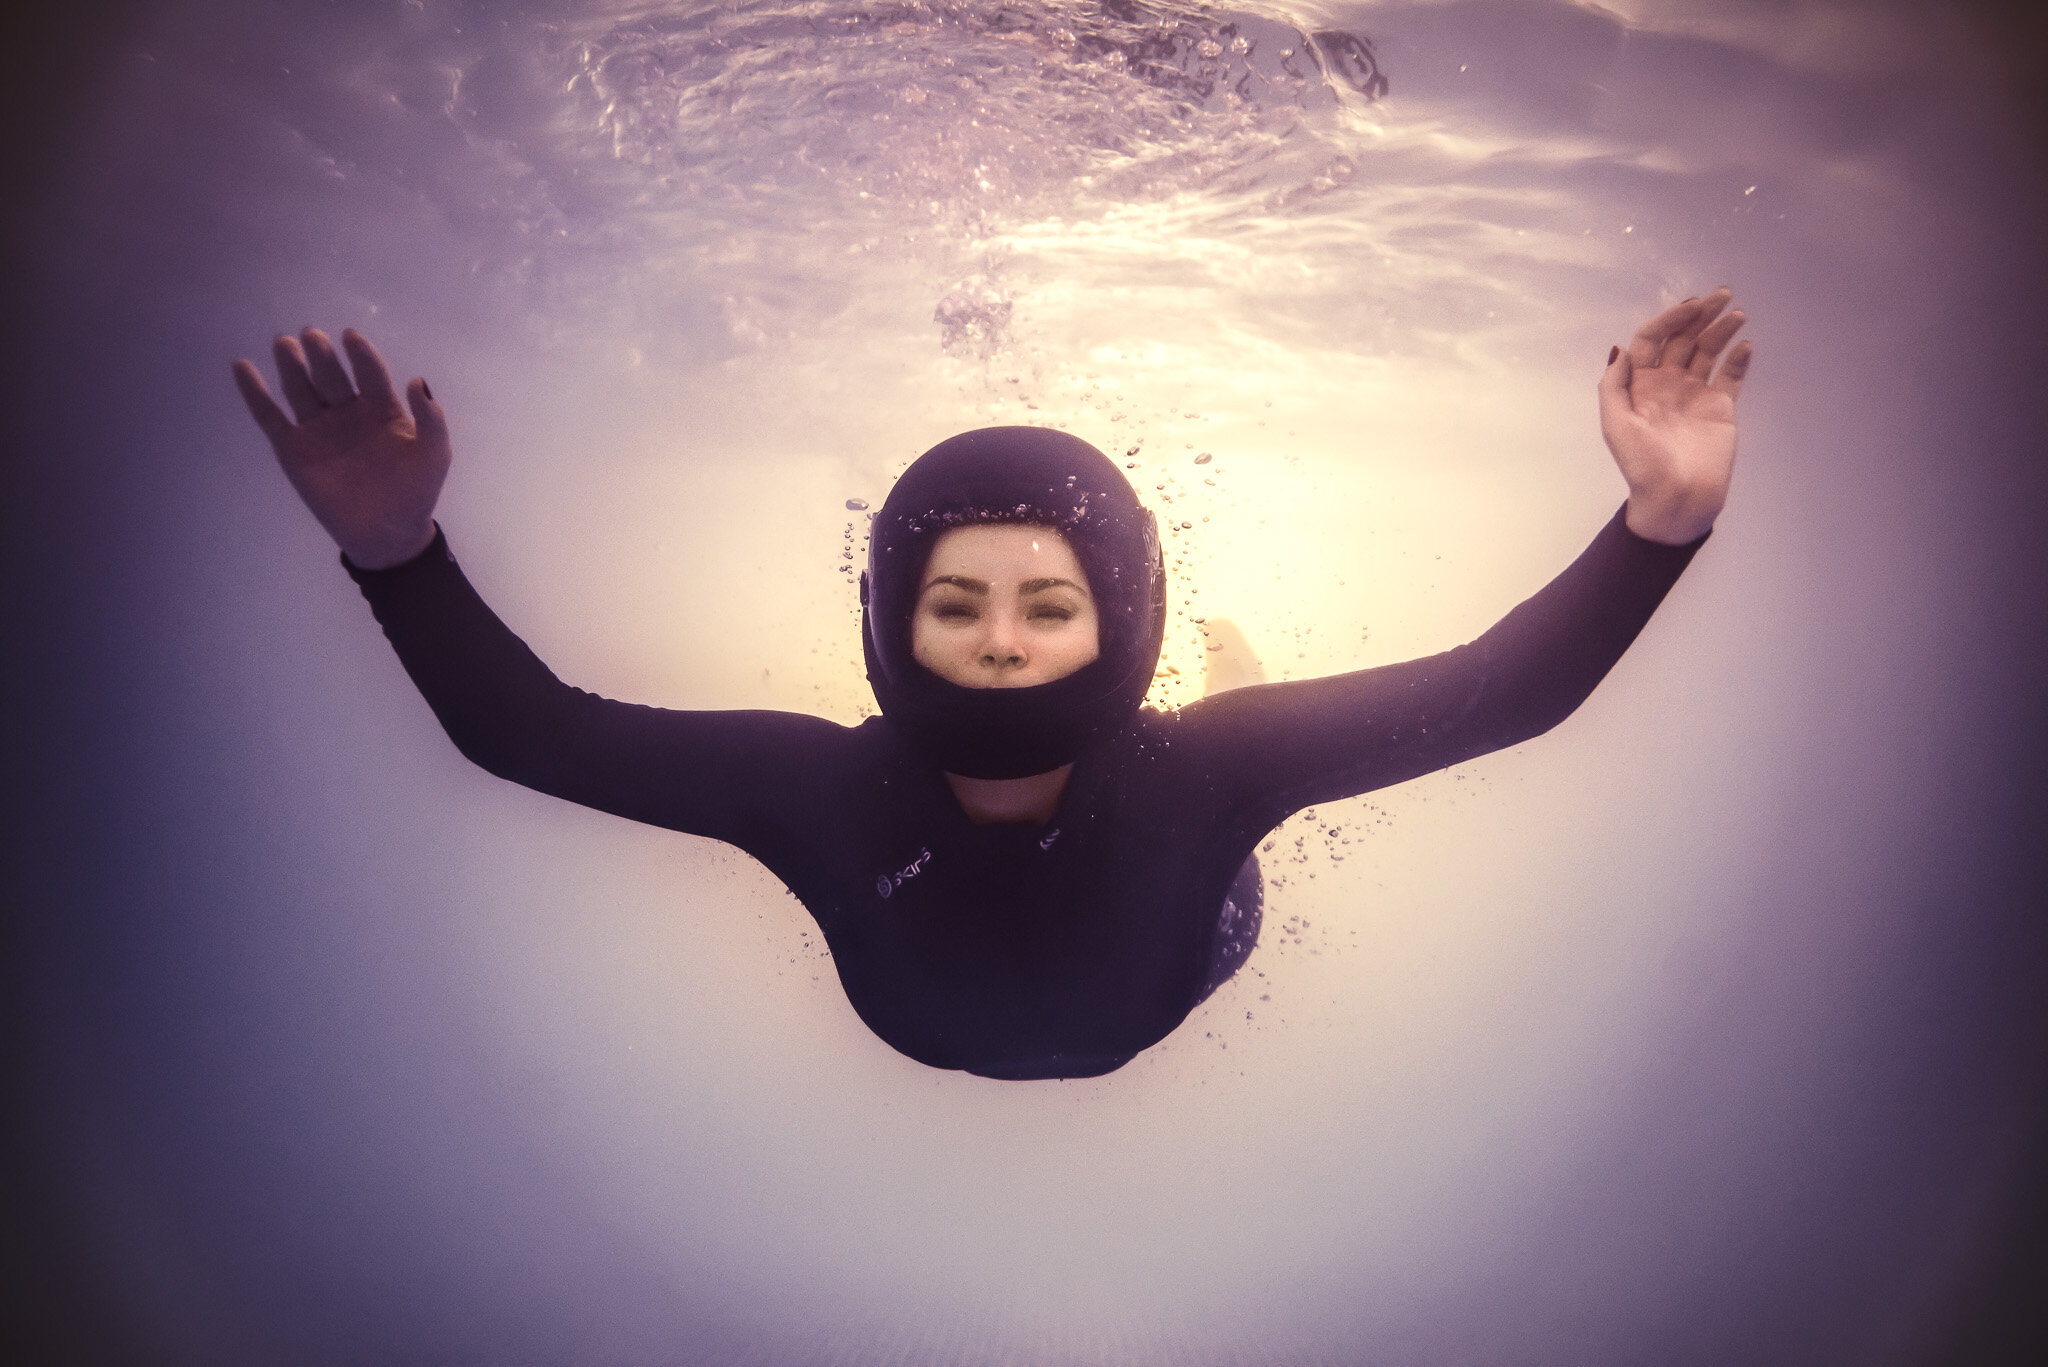
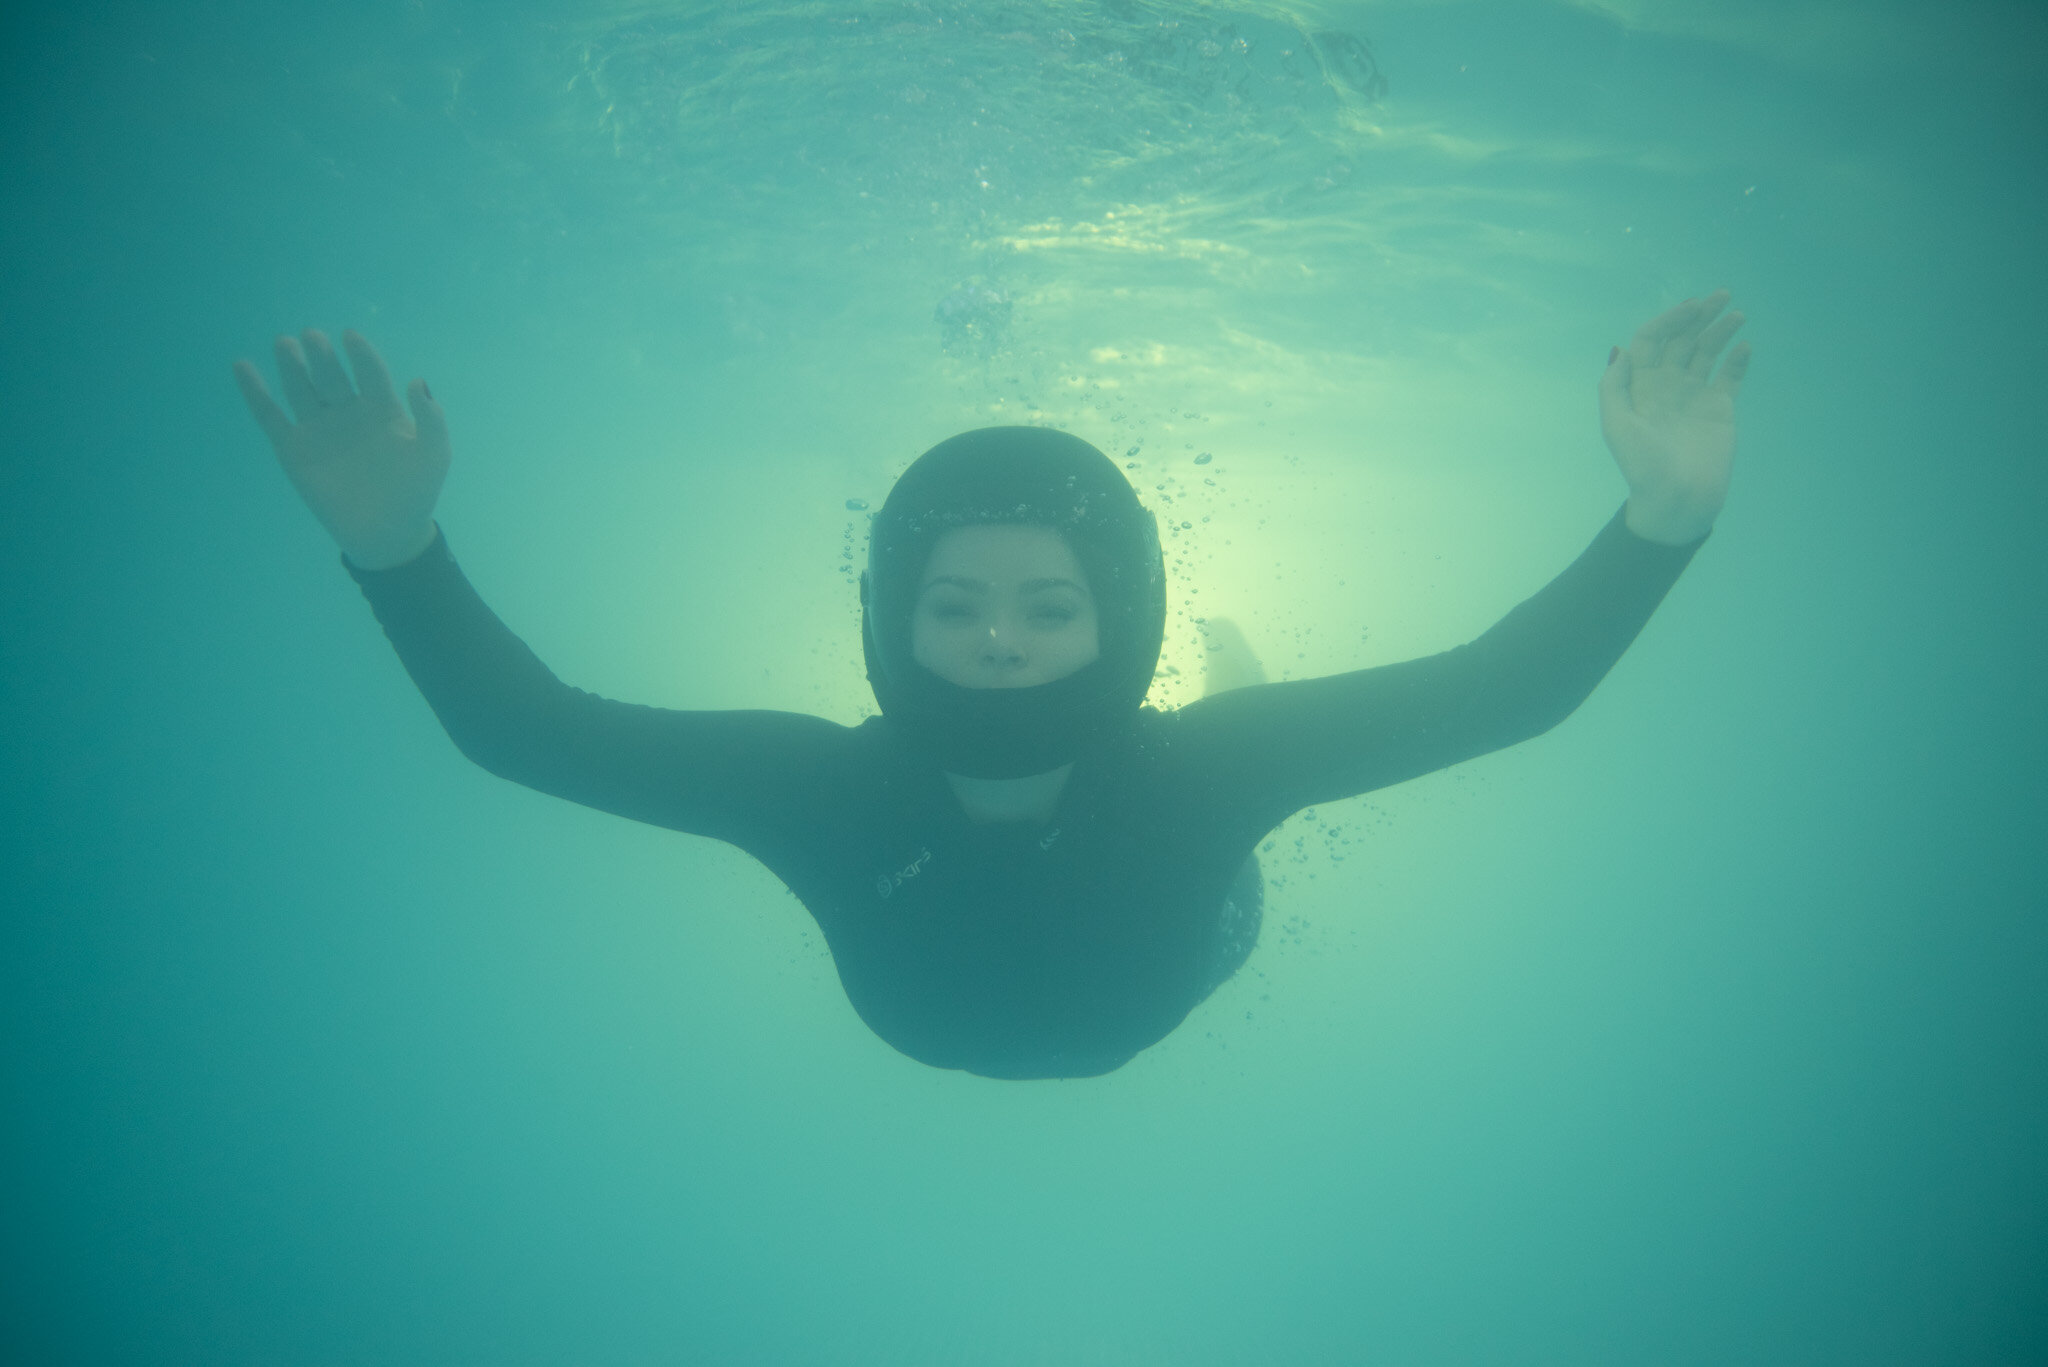
Click on the photos below to toggle between the finished shot and the straight-out-of-camera RAW image.
For my underwater portraits, I edit using Adobe Photoshop CC and Alien Skin Exposure 3.
Even when photographing in crystal clear water like Mexican cenotes, retouching an underwater portrait can prove a challenge. Thanks to so many ever-changing variables from body positioning to hair movement to lighting, the number of 'workable’ images is often much lower than on dry ground. Sometimes you must place faith in a washed out image to uncover a gem.
Some edits are made for artistic purposes, such as subduing details of the pool to give a sense of depth or freedom. The clarity of water plays a significant role in how much exposure, contrast and clarity to add, to bring the subject into focus.
Others involve subtly readjusting body shape, which can be distorted by the buoyancy of water or mottled lighting from the surface, to give a more natural appearance.
Colour is particularly difficult, especially if you are not embracing water’s natural hue. Whether you’re working in the sea, cenote, outdoor or indoor pool can make a huge difference to the colour balance, tint and cast. Most of my time editing is spent adjusting colours until I have the desired feel.
I hope this insight into the challenges and care of my editing process has interested you.
If you’d like to book me to photograph you or someone you know underwater, please get in contact here.